If you think that maybe you cut some corners with your base training over the past few months then just stick at it a little bit longer, then begin the next phase of your training when you know you’re ready. Don’t beat yourself up about it either – it’s just a few weeks or months, and it’s summer outside! Get out there and enjoy being on your bike.
OK, base training under control? All set to get faster? Right, here we go…The endurance phase of your training (or base-building) which you embarked upon last issue was intended to get you accustomed to being on the bike and to optimally develop your slow-twitch muscle fibres. Endurance training stimulates increased efficiency in these fibres, improves oxygen delivery, increases the number of mitochondria (thereby improving blood flow) and improves fat metabolism. In other words, you’re fitter than when you started riding.
This foundation that you’ve built is what all your future training and performances are based upon. With solid preparation you’ll find your season a success. Neglect this foundation and you’ll lack the stamina for more intense training and competition as the year progresses.
Now, if someone were to ask you “How do I get faster at riding my bike?”, your answer might well be “Practice riding faster” – and essentially you’d be right. However, it is clearly not a very scientific or sensible approach to simply get on your bike every day and ride as fast as you can! Like all processes, your training needs structure, and one of the best, most time-efficient ways to structure a cycling training plan is to build in some interval training.
Whenever interval training comes up in conversation with cyclists and/or coaches, lots of high-tech and seemingly contradictory terminology gets thrown around. Threshold heart rate, critical threshold power, anaerobic threshold, lactate threshold, OBLA (Onset of Blood Lactate Accumulation), functional threshold power, so on and so on. This stuff sounds way more complicated than it really is, and here’s the reason: they’re all essentially the same thing! All the terms listed above, and plenty more quantitative analysis terms, are describing this: the speed (or effort, or heart rate, or power output) that you can sustain for maybe an hour, but if you were to accelerate only marginally you couldn’t continue for more than a few minutes. For most fit cyclists, this phenomenon of ‘going lactic’ occurs when they ride at an effort requiring 80-90% of their maximum heart rate or maximal oxygen consumption (VO2Max).
This threshold figure is quite important, as it’s used as a reference point to build interval training sessions around. To find out your threshold (let’s just call it that ‘cause it’s easier than the other jargon and acronyms) you can go to a sports lab, hand over a couple of hundred dollars and get an extremely accurate reading. When you consider what most cyclists spend on carbon wheelsets, aero helmets and titanium skewers this is actually money well spent.
The other way is to conduct your own test. It won’t be quite as accurate, but it will still be well within 5% of the lab test results.
Here’s how to do it:
Step One – Find a test course. Locate and measure a five-kilometre course that’s as flat as possible and doesn’t have a lot of traffic. Try to pick a day that’s calm with moderate temperatures. Your baseline test will take place over this course.
Step Two – Fuel up. Eat a good healthy meal at least two hours before you ride, and make sure you hydrate. Have an electrolyte drink 40 minutes prior to your ride.
Step Three – Warm up. Ride for about 20 minutes at a moderate pace with a few quicker bursts thrown in. You should be sweating by the end of your warm-up.
Step Four – Start. Roll up to your start line in a gear that enables you to make a quick, stable start out of the saddle. When you hit top pedal cadence in your starting gear, sit back in the saddle and change up gears. Find a gear that allows you to maintain a cadence of 85-100 rpm. Try to ascertain which gearing and cadence gives you the most efficient pedalling pattern. This may take some trial and error to get just right.
Step Five – Find your rhythm. Settle in to steady pattern of breathing and pedalling. Don’t be scared to make it hurt a bit. If it isn’t painful by now, start to push even harder. You should be working at a perceived effort of eight or nine out of 10. Keep the pressure on right up to the finish line.
Step Six – Record your data. Check your exact time for the ride, along with maximum heart rate, average heart rate and, if you have a power meter, peak power and average power.
Step Seven – Cool down. Have a nice easy ride of about 20 minutes to cool down and flush the lactic acid out of your legs.
TRAINING ZONES
%Max Heart Rate % Threshold Power
- 50-70 30-50 Easy/Recovery
- 50-87 45-73 Base/Endurance
- 88-90 81-85 Aerobic Capacity Training
- 92-94 85-90 Lactate Threshold Training
- 94+ 90+ Maximum aerobic training,
Increasing VO2Max
OK, now you have your threshold figure – your average heart rate or average power for your five kilometre time trial is within five per cent of your threshold. For example, if your average heart rate for the ride was 155, then your threshold will be somewhere between 151 and 159 BPM. The same applies if you are fortunate enough to have a power meter. If you averaged 240 watts for the ride, your threshold power will be between 234 and 246 watts.
Go back in a few months and re-ride your time trial. Try to replicate the conditions, time of day, temperature etc. as closely as you can. Once again, record your results and compare them to your first effort. After we introduce some interval training into your program you’ll definitely see some improvement! A useful aspect to improving your performance is keeping a diary. It may be a spreadsheet if you are that way inclined or do it ‘old school’ using a diary and a pen…
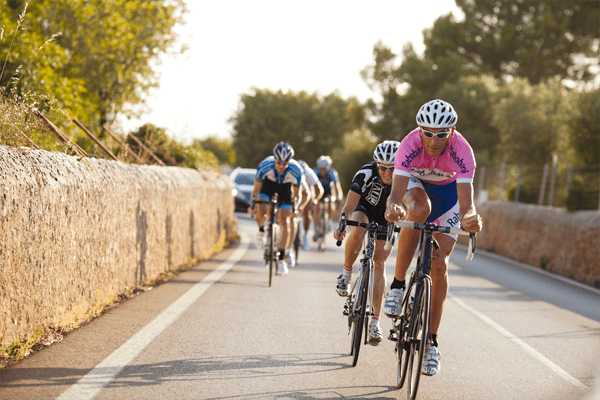
The best way to begin interval training is to incorporate it into your bunch rides. You can do this by telling your riding buddies that you’ll do some extra turns at the front of the bunch on a given day.  Instead of swapping turns like you usually do, spend six or eight minutes at the front of the pack, setting the pace. Ride a bit harder than you normally would, but not hard enough to blow yourself up or annoy your fellow riders too much.
Alternatively, you can deliberately drop off the back of the bunch, let them get a lead of 20 or 30 seconds, and then work to catch them again. Do this three or four times during the ride. It may not sound like a big deal, but closing a 30-second gap is a lot of work, even if your bunch is rolling along a fairly sedate pace. Beware of getting trapped by traffic lights too. If the bunch sneaks through a yellow light you may have your work cut out for you catching them again!
So for the next few weeks start turning one of your weekly bunch rides into a mini interval session. Don’t go too hard to begin with, but increase the intensity and duration of your intervals as time goes by.
A FEW WORDS ABOUT POWER
How does the added element of power monitoring play into training? Power output readings don’t replace heart rate measurement; instead, they work together to give a bigger performance picture. The main benefit of power is that it allows you to measure actual workload rather than make a guess at it based on heart rate, which can be affected by fatigue, environment and other factors.
Combine heart rate and power output and you have a truly comprehensive training tool. For example, if you are putting out the same power at a lower heart rate than previous efforts over the same terrain, you can measurably tell that your fitness has improved.
The downside regarding power meters is that they are pretty expensive. But like most technology-based toys, they’re getting cheaper all the time. It wasn’t that long ago that a heart rate monitor was considered an expensive luxury gimmick that only sports labs and pro athletes could afford. Now nearly every recreational and competitive cyclist has one.
This purpose of this article is not to convince you to rush out and buy a power meter. If you already have one, that’s great. If not, just make the most of your heart rate monitor. We can still build an excellent and accurate training plan using the data you get from that.
If you do have both, then use your power meter to control and monitor your more arduous tempo rides and interval sessions, and use your heart rate feedback to dictate your recovery sessions and easier rides.
Hill Repeats
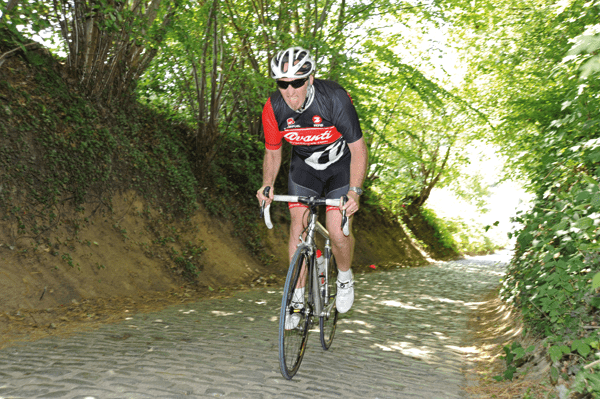
Hill repeats are simple but effective. Rather than simply getting up any hills that you encounter on your regular rides, seek them out and attack them! Hill repeats are a time-efficient way to increase your aerobic capacity, improve anaerobic efficiency and build awesome leg strength. Ideally you will have at least three types of hill in your training area that you can incorporate into your program:
- This is a nasty, short, steep hill that’s hard to get up regardless of the gear you’re in.
- This is a moderate, uniform hill somewhere between 400m and 1,000m in length.
- This is a gradual, long climb (more than one km and preferably four or five km).
Hill #1: Pick a landmark such as a power pole or fire hydrant about 40 or 50m from the crest of the hill. Standing up out of the saddle, start at the bottom of the climb and make your way up to your landmark working at or slightly above your threshold heart rate. Sit down in the saddle, change up two gears, then stand up and power up over the crest of the hill as hard as you can. Be sure to get a good five-minute recovery before repeating this interval.
Hill #2: Pick an even number of intervals to do on this hill (maybe start with two, then work your way up to four and then six). Select an easy gear in the small chainring that will enable you to ‘spin’ up the climb with a fairly high cadence. Stay down in the saddle and accelerate up the climb, keeping your heart rate hovering around or slightly above your threshold. When you crest the hill, check for traffic and immediately turn around and ride back down, changing into the big chainring as you ride. Turn around and climb the hill again, keeping it in the big chainring and staying out of the saddle. You’ll have to work hard to make it up the hill, and your legs will be screaming. Don’t even bother checking your heart rate, just get up that hill without changing down gears and without touching the saddle. This workout is great for increasing your aerobic capacity and for building leg strength.
Hill #3: You need two landmarks on this hill, approximately 1/3 and 2/3 of the way up. Remember to pick landmarks that are big and easily recognisable – a power pole or brightly-painted house will be much easier to spot than a letterbox or manhole cover.
Select a gear that will enable you to ride at a comfortable cadence. Ride the first section in Zone Three (88-90% of your MHR) then accelerate smoothly up to Zone Four (92-94% of your MHR). When you reach your final marker its time to step it up to Zone Five. Bring your heart rate up above 94%, stand up out of the saddle if you need to and power up to the crest of the hill. This one’s gonna hurt!
Over-Under Intervals
These intervals are great for building your power at and above your threshold. On a reasonably flat stretch of road, in a moderate gear with a cadence around 100rpm, slowly bring your heart rate up to your threshold (remember, if you are using a power meter but don’t have a heart rate monitor, come up to your power threshold). Maintain this level of intensity for five minutes then bring your heart rate up five beats above your threshold. Keep it there for one to two minutes then bring it back down to your threshold. Maintain this for five minutes then repeat. Repeat again if necessary. Because you’ll be building up considerable amounts of lactic acid during this session, a long steady cool down is vital for adequate recovery.
Steady State Intervals
As the name suggests, these intervals are steady and consistent, and will help build your endurance and your power at threshold level. The type of road you’re riding on doesn’t matter much. Rolling, flat or hilly, it will still work. Build your pace and heart rate up gradually (over a period of 10 or 15 minutes) until you get up into Zone Four (92-94% of MHR). Now, no matter the conditions or terrain, keep it in Zone Four for 20 minutes. On paper this looks like an easy workout, but don’t be fooled. The effort of maintaining such a high heart rate and not letting it drop is exhausting.
A Few Words About Intervals
Interval training is one of the fastest and most efficient ways to improve your cycling. Like all good things, there is a price to pay – in this case, it’s all about recovery. Once you have built a strong fitness base you can quite easily roll out back-to-back long rides without too much fatigue or soreness. However, when you lift the intensity up toward that threshold you need to ensure you recover properly afterwards. This includes a nice long cool-down and an easy day following your intervals. This can take the form of a light ride, a Yoga or Pilates class or a day of total rest.
Remember also that the attached training tables are not set in stone. If you would prefer to have your key workouts on Wednesday and Thursday rather than Saturday and Sunday, go for it. Just shuffle the days around accordingly and continue on with the program.
Take note that Week Seven of both programs is an easy week. Take advantage of this, wind your training back a bit and recover completely. If you’re really feeling fatigued then take the week off completely.
If you miss a few workouts through injury, illness, work or just life, don’t try to catch up by riding further of harder to make up for what you missed. You’ll end up overdoing things and getting sick or injured again. Instead, be patient and add an extra week or two onto the program.
Finally, keep track of your progress. Keep notes or a diary recording time, distance, intervals, power output and anything else worth noting. It’s a great way of tracking your improvement and will make interesting reading a few years down the track.

